I remember standing in a living room in Surrey back in ’94, the air thick with the cloying, heavy scent of damp plaster and charred timber. The homeowner was frantic, waving a handful of crumpled receipts and pointing at a pile of blackened debris, swearing he’d lost everything. He thought he was prepared, but he was missing the one thing that actually matters when the adjuster sits down: the verifiable link between the loss and the policy wording. Most people think a “complete guide to claim evidence” is just a checklist of photos and receipts, but they’re wrong. Real evidence isn’t just about showing what you lost; it’s about proving how and why it happened in a way that leaves no room for an insurer to argue.
I’m not here to give you a generic list of tips you could find on a corporate website. I’ve spent thirty-seven years on the other side of the desk, and I know exactly which pieces of paper hold weight and which ones are just expensive scrap. In this guide, I’m going to show you how to build a file that stands up to scrutiny, ensuring you aren’t left staring at a declined claim because you forgot to document the right detail at the right time.
Beyond the Policy a Complete Guide to Claim Evidence
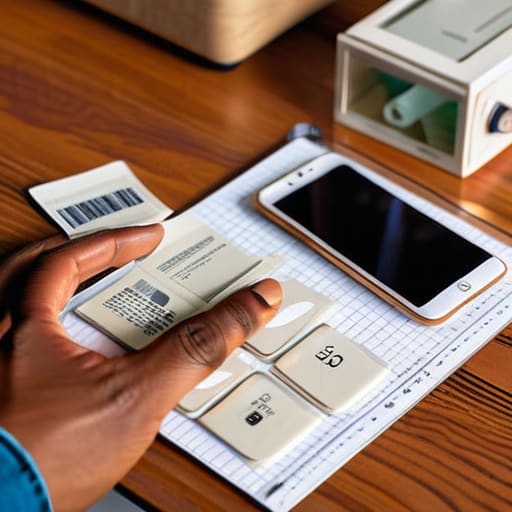
When I walked onto a site after a burst pipe or a break-in, the first thing I looked for wasn’t the damage itself, but the proof of what existed before the incident. Most people make the mistake of thinking a photo of a ruined sofa is enough. It isn’t. To a loss adjuster, a photo proves a loss occurred, but it rarely proves the value or the condition of the item. You need to be organizing proof of loss long before the disaster strikes. This means having a digital folder of receipts, serial numbers, and even those mundane photos of your living room taken for a holiday card.
If you are staring at a mess right now, stop moving things around and start maintaining a paper trail for claims. Every single item lost or damaged needs a breadcrumb trail: a receipt, a bank statement, or a dated photograph. If you can’t find the original slip, find the digital footprint. I’ve seen claims stall for months simply because a policyholder couldn’t prove they actually owned the high-end appliance they claimed was destroyed. Evidence is the bridge between your word and your payout.
The Paper Trail Maintaining a Paper Trail for Claims
In my thirty-seven years, I’ve seen more claims stall not because of dishonesty, but because of a lack of continuity. People tend to treat receipts and warranties like junk mail until the moment a pipe bursts or a fire breaks out. By then, the paper trail is a mess of faded thermal printer slips and lost emails. If you want to avoid a headache, you need to start maintaining a paper trail for claims long before the disaster strikes. I always tell my neighbors: keep a dedicated folder—physical or digital—for every major appliance, piece of furniture, or structural improvement you make to your home.
When the adjuster finally walks through your door, they aren’t looking for your word; they are looking for verifiable proof. This is where organizing proof of loss becomes your most powerful tool. A simple spreadsheet paired with scanned receipts and dated photographs turns a vague conversation about “a ruined kitchen” into a precise, undeniable list of assets. It moves the conversation from “what do you think it’s worth?” to “here is exactly what it cost.” That distinction is often the difference between a settlement that covers your deductible and one that leaves you out of pocket.
Winning the Argument How to Document Damages Effectively
When I was out in the field, I didn’t look for people who were angry; I looked for people who were organized. If you want to win the argument, you have to stop treating your evidence like a scrapheap and start treating it like a legal brief. You aren’t just showing me a broken window; you are proving the cause of loss and the exact extent of the damage. This means taking high-resolution photos from multiple angles—wide shots to show context and close-ups to show detail—before you move a single piece of debris. Validating claims with digital evidence is much easier for an adjuster to accept than a frantic, blurry photo taken in the dark.
The real battle is often won or lost in the details of your inventory. Don’t just tell me “the kitchen is ruined.” I need a spreadsheet. I need to see the brand, the model number, and the approximate age of every item affected. When it comes to organizing proof of loss, the person with the clearest list usually dictates the pace of the claim. If you can hand me a tidy document that matches the physical reality of the room, you’ve already done half my job for me, and that makes it much harder for me to dispute your numbers.
Digital Proof Validating Claims With Digital Evidence
In my thirty-seven years, I’ve seen the “evidence” pile change from soggy notebooks to overflowing smartphone galleries. While a photo of a charred living room is a start, a single snapshot rarely tells the whole story an adjuster needs to see. If you want to succeed at validating claims with digital evidence, you have to move beyond the obvious. I’m not just looking for the damage; I’m looking for the context. I want to see the ceiling from three different angles, the water line on the drywall, and the serial number on the appliance that failed. A single photo is a claim; a video walk-through is a narrative.
Don’t just snap a picture and let it sit in your camera roll. You need to be disciplined about organizing proof of loss the moment the crisis hits. Create a dedicated folder on a cloud drive immediately. Group your photos by room and date, and for heaven’s sake, ensure your metadata—the time and location stamps—is intact. When I sat across from a claimant who had a timestamped, categorized digital folder ready to go, the conversation shifted from “if” they were covered to “how much” the settlement would be. It turns a dispute into a simple matter of fact.
The Final Defense Essential Documentation for Legal Claims
Now, we get to the part where the pleasantries end and the lawyers might start looking over your shoulder. When a claim moves from a simple disagreement about a repair bill to a formal legal dispute, the standard of proof shifts. It isn’t enough to just show me a photo of a broken window anymore; you have to prove the exact circumstances of the loss to satisfy the specific legal thresholds in your contract. This is where organizing proof of loss becomes your most critical task. If you can’t present a chronological, unbroken chain of events and costs, a legal team will find the gaps and drive a wedge right through your claim.
I’ve seen many people lose a fight not because they weren’t wronged, but because their records were a mess of scattered receipts and half-remembered dates. You need to treat your files as if they are being prepared for a courtroom from day one. This means gathering every single piece of essential documentation for legal claims, including expert reports, professional assessments, and even correspondence with your broker. If it isn’t documented, in the eyes of a legal representative or a senior adjuster, it simply didn’t happen.
Five Things I’ve Learned Standing in the Rubble
- Stop cleaning up before you’ve taken your photos. I’ve seen countless people throw away damaged goods or scrub a water-stained floor because they wanted to “get on with it,” only to realize later they’ve just thrown away the only physical proof the insurer needed to verify the cause of loss.
- Keep the receipts, even for the small stuff. People always remember the big television, but they forget the expensive kitchen appliances or the specialized tools. If you can’t prove you owned it and what it was worth, I can’t justify paying out for it, regardless of how much you swear you had it.
- Context is everything in a photograph. A close-up of a cracked tile tells me very little; a wide shot showing the cracked tile, the leaking pipe above it, and the puddle on the floor tells me a story. Always take the “wide” shot first so I can see exactly where the damage sits in the room.
- Don’t rely on memory for timelines. When a claim gets complicated—and they usually do—I’m going to ask you exactly when a leak started or when a security breach occurred. If your answer changes between the first phone call and the formal statement, it makes the whole claim look suspicious. Write it down the moment it happens.
- Log your communications as if you’re preparing for court. Every time you speak to an adjuster or a broker, note the date, the time, and exactly what was said. In my thirty-seven years, the most difficult claims weren’t about the damage itself, but about the “he said, she said” regarding what the company promised during the initial report.
The Adjuster's Summary: Three Things to Remember Before You File
Evidence is only as good as its connection to the policy; don’t just photograph the damage, photograph the specific items and circumstances that the wording says are covered.
A pile of receipts is good, but a chronological paper trail that proves value and ownership is what actually stops an insurer from lowballing your settlement.
Stop thinking of documentation as a chore and start seeing it as your primary defense—by the time I walk through your door, the window for “proving” the loss is already closing.
The Bottom Line on Your Evidence
At the end of the day, a claim isn’t won by whoever has the loudest voice or the most convincing story; it is won by whoever has the most coherent paper trail. You’ve learned that whether it is a digital photo of a burst pipe, a dated receipt for a replacement appliance, or a meticulous log of damage, every scrap of information serves one purpose: to bridge the gap between what you say happened and what the policy actually covers. Remember, an adjuster isn’t there to judge your character, but to judge your proof. If you can’t substantiate the loss with something tangible, you are essentially asking the insurer to take your word for it—and in my thirty-seven years, I can tell you that “trust me” is not a valid form of evidence.
It is easy to feel overwhelmed when disaster strikes, but don’t let the chaos of the moment rob you of your rights. Insurance is a contract, and that contract is built on the foundation of facts and documentation. By being proactive now, you are doing more than just collecting receipts; you are building a shield that protects your financial future. Don’t wait for the smoke to clear to start looking for your records. Prepare your evidence while the sun is still shining, so that when the storm inevitably arrives, you aren’t left staring at a denied claim wondering where it all went wrong.
Frequently Asked Questions
If I’ve already thrown away the damaged items or cleaned up the mess, is it too late to prove what I lost?
It’s not too late, but you’ve just made my job—and yours—significantly harder. When the physical evidence is gone, we move from “seeing is believing” to “proving it through proxy.” I’ll be looking for receipts, bank statements, or even old photos of the room to establish what was there. If you’ve cleaned up, stop. If you can’t show the damage, you’d better be prepared to show the paper trail that replaces it.
How much weight does a professional repair estimate actually carry compared to my own photos and receipts?
Look, your photos prove the damage happened, and your receipts prove what you spent, but they don’t prove what it will cost to make things right. A professional estimate carries more weight because it speaks the language of the adjuster. It’s not just a number; it’s a breakdown of labor, materials, and industry standards. Your photos show the “what,” but a contractor’s quote explains the “how much.” I’ve seen many a claim stalled because a homeowner’s math didn’t match the reality of the trade.
At what point does collecting too much evidence start looking like I'm trying to inflate the claim?
It’s a fair question, and one I’ve seen play out in a dozen different ways. There is a fine line between being diligent and being suspicious. If you start submitting receipts for items you never owned or photographing “damage” that clearly predates the incident, you aren’t just being thorough—you’re flagging yourself for a fraud investigation. Stick to the facts: document what was actually there, what happened to it, and how much it cost. Precision is your friend; desperation is your enemy.